|
|
The control's release notes can be found on our web site, looking for the Release Notes column in the control's main page. Click here for direct link. |
|
|
One of the following properties points to some invalid paths: |
|
|
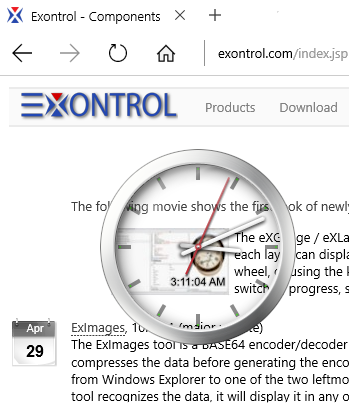
"I would like to put the control on a form, then make the form transparent so the control appears on the desktop with just the images contained in the layers visible. For example, take a clock example and make the control background and the form transparent, and you have a working clock widget." |
|
|
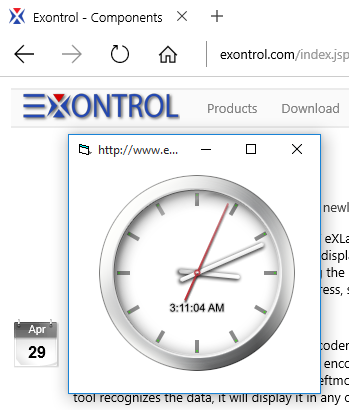
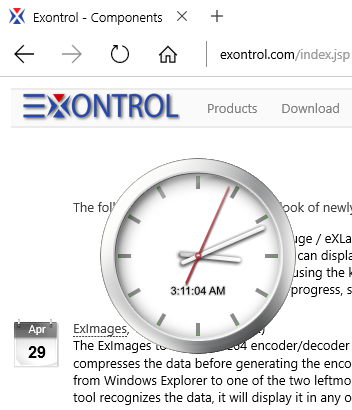
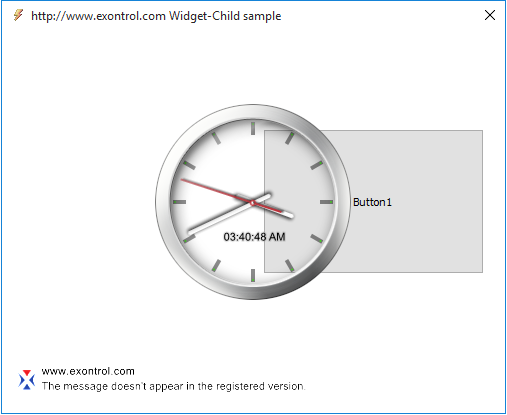
The following screen shot shows the transparent-control on a form: |
|
|
The control provides the AllowMoveOnClick property that allows using the form, once the user clicks a non-drag able object on the layers. |
|
|
You can use directly the SetLayeredWindowAttributes API function, or you can use the ExTransparent component: |
|
|
The most probably you get: |
|
|
For instance, having the files Layer1.png, Layer2.png, Layer3.png, Layer4.png and Layer5.png in the C:\Program Files\Exontrol\ExGauge\Sample\Design\Circular\Knob 2 folder: |
-

- Gauge
- Home
- Code
- Templates
- Help
- FAQ
- How to
- See Also
- RadialMenu ExRadialMenu is a radial (pie) menu component inspired by Microsoft OneNote, offering customizable appearance and functionality through a tree-structured organization of tools and tool collections.
- ScrollBar ExScrollBar is a customizable scrollbar component that simulates vertical and horizontal scrollbars, sliders, tracks, volume controls, and gauge interfaces for application UI design.
-
Products
-
COM Components
- Suite ExSuite is a complete developer solution offering a suite of UI components including combo, list, tree, grid, Gantt, gauge, and chart controls for advanced data visualization and application development.
- Agent ExDialog is a UI control that enables adding interactive dialog elements and images to applications or websites, enhancing user experience with customizable visual personalities.
- Button ExButton is an advanced Windows button control offering customizable skins, HTML captions, transparent graphics, a WYSIWYG skin builder, and complete visual control.
- CalcEdit ExCalcEdit is a calculator edit control for real-time arithmetic expression evaluation, instant calculation results, and enhanced data entry within software applications.
- Calculator ExCalc is a calculator component that provides arithmetic operations, customizable layouts, user-defined functions, and flat or drop-down calculator controls for seamless application integration.
- Calendar ExCalendar is a customizable calendar and date picker component featuring intuitive date selection, visual customization, tooltips, image support, and flexible date range handling.
- CascadeTree ExCascadeTree is a Miller Columns tree view component for visualizing hierarchical data, offering cascading lists, multi-column navigation, and efficient data exploration.
- ComboBox ExComboBox is an advanced combo box component combining a drop-down list and a single-line text box, allowing users to type a value or select from existing options.
- ContextMenu ExContextMenu is a GUI context menu component providing popup, shortcut, and right-click menus for fast access to context-specific commands and improved application usability.
- DataView ExRecord is a container control that displays a set of editors either manually defined or bound to database tables, enabling structured data entry and management.
- Edit ExEdit is an easy-to-use edit control with built-in HTML-like formatting and syntax highlighting, supporting custom tags for keywords and expressions for flexible text editing in applications.
- ExplorerBar ExplorerBar is a navigation component that reproduces the Windows XP Explorer Bar, designed for presenting large amounts of information with an intuitive interface and rich object model.
- ExplorerTree ExplorerTree is a navigation tree component that adds structured information browsing and easy navigation capabilities to applications for improved user interface organization.
- Expression Expression is a syntax editor component for defining, viewing, editing, and evaluating expressions within applications, enabling flexible expression handling and processing.
- FileView ExFileView is a file and folder view component that provides Windows Explorer-style functionality for displaying rich directory information and simulating a FolderView control within applications.
- FolderView ExFolderView is a folder tree-list view component that replicates the Windows Explorer left pane, providing hierarchical folder navigation and directory browsing within applications.
- Gantt ExGantt is a Gantt chart component for creating timeline and project scheduling visualizations, displaying activity durations as horizontal bars alongside tabular task information with customizable skins.
- Gauge ExGauge is a graphical component library for visually displaying and editing values such as levels or quantities using multi-layer views with interactive images and HTML captions.
- Graph ExGraph is a data visualization component supporting multiple chart types including line and radar charts, with printing and print preview capabilities and customizable skins for enhanced visual presentation.
- Grid ExGrid is a tree-grid component that combines grid, tree, and list views with data-bound or unbound support, offering flexible data visualization and advanced formatting features for modern application interfaces.
- Grid-Gantt ExG2antt is an editable tree-grid component with integrated Gantt chart functionality, combining grid and Gantt features in a single control with customizable skins for enhanced visualization and user experience.
- Grid-Gantt (Host) ExG2Host is a Grid-Gantt extension component with full database support (ADO, DAO, XML), enabling automatic loading and saving of hierarchical data and layout persistence for seamless data binding and synchronization.
- HTML ExHTML is a built-in HTML display and editing engine that enables rendering and editing of HTML-like content without relying on Internet Explorer, providing flexible UI layout management for text, controls, and graphics.
- ICalendar ExICalendar is a component library implementing the iCalendar data format (RFC 5545), enabling exchange of calendaring and scheduling information such as events, tasks, and free/busy data between applications.
- Label ExLabel is an HTML label component for forms and dialogs, enabling rich text display within application user interfaces.
- List ExList is an advanced list control for displaying and editing tabular data, offering customizable skins for enhanced visual appearance and flexible UI presentation.
- ListBar ExListBar is a navigation bar component modeled after Microsoft Outlook Bar, designed for displaying large amounts of information with horizontal or vertical orientation and an intuitive object model.
- MaskEdit ExMaskEdit is a masked edit control that enforces structured data entry in input fields, helping ensure consistent formatting for values such as phone numbers, dates, and other structured data.
- Menu ExMenu is a versatile menu component that simulates menu bars, popup menus, toolbars, option buttons, and pick lists, providing flexible UI navigation and interaction for applications.
- Miller ExMiller is a file and folder view component that uses Miller Columns visualization to display system directories and files in a cascading list structure for efficient navigation.
- NETHost ExNETHost is a component that enables embedding .NET Windows Forms user controls into COM-based applications, forms, and dialogs for seamless UI integration.
- OrgChart ExOrgChart is an organizational chart component for automatic generation of hierarchy diagrams, displaying nodes with HTML captions, icons, and images for clear visualization of structures and relationships.
- Pivot ExPivot is a pivot table tool for data summarization, enabling automatic sorting, counting, totaling, and averaging of tabular data with drag-and-drop field configuration.
- PopupMenu ExPopupMenu is a popup and menu bar component that enables shortcut menus, window menus, and menu buttons with a WYSIWYG editor for intuitive menu creation.
- Print ExPrint is an advanced printing component that adds print and print preview capabilities to user interfaces, enabling rendering of forms, dialogs, and UI controls such as grids, trees, lists, and calendars.
- PropertiesList ExPropertiesList is a properties grid control similar to Visual Studio's property editor, designed for efficient data input and compact, intuitive user interface property management.
- RadialMenu ExRadialMenu is a radial (pie) menu component inspired by Microsoft OneNote, offering customizable appearance and functionality through a tree-structured organization of tools and tool collections.
- Ribbon ExRibbon is a ribbon-style UI component similar to Microsoft Office Fluent interface, displaying graphical controls organized into tabbed toolbars for improved application navigation and usability.
- RolList ExRolList is an innovative list control that displays items on an elliptical shape, rotating content to keep items visible without traditional scrolling for a unique user interface experience.
- Scheduler ExSchedule is a scheduling component that enables appointment management and scheduling functionality within applications, providing structured planning and calendar-based organization.
- ScrollBar ExScrollBar is a customizable scrollbar component that simulates vertical and horizontal scrollbars, sliders, tracks, volume controls, and gauge interfaces for application UI design.
- ShellView ExShellView is a file list view component that replicates the Windows Explorer right pane, providing detailed shell-based file browsing within applications.
- SkinBox ExSkinBox is a skinnable message and input box component that supports HTML-formatted content and custom images for enhanced dialog presentation.
- Slider ExSlider is a skinnable slider component for forms and dialogs, enabling customizable slider controls for selecting values within applications.
- SplitBar ExSplitBar is a splitter component that enables dynamic resizing of docked controls by dragging a split bar between panels in horizontal or vertical layouts.
- StatusBar ExStatusBar is a fully customizable status bar component featuring CRD-based layout, skinning, HTML support, tooltips, icons, owner draw, and progress bar capabilities for rich application interfaces.
- Surface ExSurface is a visual layout component for organizing objects on a surface to create organigrams, diagrams, graphs, flowcharts, and other structured visual representations.
- Swimlane ExSwimLane is a swim lane diagram component for creating process flow visualizations that define roles, responsibilities, and workflows in horizontal or vertical layouts.
- Tab ExTab is a skin-based tab control for organizing interface content using tabs, similar to notebook dividers or file cabinet labels, enabling structured navigation within applications.
- Thumbnail ExThumbnail is a thumbnail view component that displays reduced-size previews of files and images, making it easier to browse and recognize visual content in applications.
- ToolBar ExToolBar is a customizable toolbar component that organizes buttons, icons, dropdowns, and editors into rows or columns, enabling quick access to application functions with skin-based appearance customization.
- ToolTip ExToolTip is a tooltip component that provides enhanced tooltip functionality for applications, displaying contextual information when users hover over interface elements.
- Tree ExTree is an advanced tree view component supporting single and multi-column tree structures, list, and listview modes for flexible hierarchical data display in applications.
- TreeCube ExTreeCube is a visualization library that provides fisheye and cube-map representations for components such as calendars and multi-column tree views, enhancing data exploration.
- XMLGrid ExXMLGrid is an XML-style grid and tree view component that provides high-performance data visualization with advanced formatting features and customizable skins for enhanced UI appearance.
-
NET Components
- Suite ExSuite/NET is a complete developer solution offering a suite of UI components including combo, list, tree, grid, Gantt, gauge, and chart controls for advanced data visualization and application development.
- Agent ExDialog/NET is a UI control that enables adding interactive dialog elements and images to applications or websites, enhancing user experience with customizable visual personalities.
- Button ExButton/NET is an advanced Windows button control offering customizable skins, HTML captions, transparent graphics, a WYSIWYG skin builder, and complete visual control.
- CalcEdit ExCalcEdit/NET is a calculator edit control for real-time arithmetic expression evaluation, instant calculation results, and enhanced data entry within software applications.
- Calculator ExCalc/NET is a calculator component that provides arithmetic operations, customizable layouts, user-defined functions, and flat or drop-down calculator controls for seamless application integration.
- Calendar ExCalendar/NET is a customizable calendar and date picker component featuring intuitive date selection, visual customization, tooltips, image support, and flexible date range handling.
- CascadeTree ExCascadeTree/NET is a Miller Columns tree view component for visualizing hierarchical data, offering cascading lists, multi-column navigation, and efficient data exploration.
- ComboBox ExComboBox/NET is an advanced combo box component combining a drop-down list and a single-line text box, allowing users to type a value or select from existing options.
- ContextMenu ExContextMenu/NET is a GUI context menu component providing popup, shortcut, and right-click menus for fast access to context-specific commands and improved application usability.
- DataView ExRecord/NET is a container control that displays a set of editors either manually defined or bound to database tables, enabling structured data entry and management.
- Edit ExEdit/NET is an easy-to-use edit control with built-in HTML-like formatting and syntax highlighting, supporting custom tags for keywords and expressions for flexible text editing in applications.
- ExplorerBar ExplorerBar/NET is a navigation component that reproduces the Windows XP Explorer Bar, designed for presenting large amounts of information with an intuitive interface and rich object model.
- ExplorerTree ExplorerTree/NET is a navigation tree component that adds structured information browsing and easy navigation capabilities to applications for improved user interface organization.
- Expression Expression/NET is a syntax editor component for defining, viewing, editing, and evaluating expressions within applications, enabling flexible expression handling and processing.
- FileView ExFileView/NET is a file and folder view component that provides Windows Explorer-style functionality for displaying rich directory information and simulating a FolderView control within applications.
- FolderView ExFolderView/NET is a folder tree-list view component that replicates the Windows Explorer left pane, providing hierarchical folder navigation and directory browsing within applications.
- Gantt ExGantt/NET is a Gantt chart component for creating timeline and project scheduling visualizations, displaying activity durations as horizontal bars alongside tabular task information with customizable skins.
- Gauge ExGauge/NET is a graphical component library for visually displaying and editing values such as levels or quantities using multi-layer views with interactive images and HTML captions.
- Graph ExGraph/NET is a data visualization component supporting multiple chart types including line and radar charts, with printing and print preview capabilities and customizable skins for enhanced visual presentation.
- Grid ExGrid/NET is a tree-grid component that combines grid, tree, and list views with data-bound or unbound support, offering flexible data visualization and advanced formatting features for modern application interfaces.
- Grid-Gantt ExG2antt/NET is an editable tree-grid component with integrated Gantt chart functionality, combining grid and Gantt features in a single control with customizable skins for enhanced visualization and user experience.
- HTML ExHTML/NET is a built-in HTML display and editing engine that enables rendering and editing of HTML-like content without relying on Internet Explorer, providing flexible UI layout management for text, controls, and graphics.
- ICalendar ExICalendar/NET is a component library implementing the iCalendar data format (RFC 5545), enabling exchange of calendaring and scheduling information such as events, tasks, and free/busy data between applications.
- Label ExLabel/NET is an HTML label component for forms and dialogs, enabling rich text display within application user interfaces.
- List ExList/NET is an advanced list control for displaying and editing tabular data, offering customizable skins for enhanced visual appearance and flexible UI presentation.
- ListBar ExListBar/NET is a navigation bar component modeled after Microsoft Outlook Bar, designed for displaying large amounts of information with horizontal or vertical orientation and an intuitive object model.
- MaskEdit ExMaskEdit/NET is a masked edit control that enforces structured data entry in input fields, helping ensure consistent formatting for values such as phone numbers, dates, and other structured data.
- Miller ExMiller/NET is a file and folder view component that uses Miller Columns visualization to display system directories and files in a cascading list structure for efficient navigation.
- NETHost ExNETHost/NET is a component that enables embedding .NET Windows Forms user controls into COM-based applications, forms, and dialogs for seamless UI integration.
- OrgChart ExOrgChart/NET is an organizational chart component for automatic generation of hierarchy diagrams, displaying nodes with HTML captions, icons, and images for clear visualization of structures and relationships.
- Pivot ExPivot/NET is a pivot table tool for data summarization, enabling automatic sorting, counting, totaling, and averaging of tabular data with drag-and-drop field configuration.
- Print ExPrint/NET is an advanced printing component that adds print and print preview capabilities to user interfaces, enabling rendering of forms, dialogs, and UI controls such as grids, trees, lists, and calendars.
- PropertiesList ExPropertiesList/NET is a properties grid control similar to Visual Studio's property editor, designed for efficient data input and compact, intuitive user interface property management.
- RadialMenu ExRadialMenu/NET is a radial (pie) menu component inspired by Microsoft OneNote, offering customizable appearance and functionality through a tree-structured organization of tools and tool collections.
- Ribbon ExRibbon/NET is a ribbon-style UI component similar to Microsoft Office Fluent interface, displaying graphical controls organized into tabbed toolbars for improved application navigation and usability.
- Scheduler ExSchedule/NET is a scheduling component that enables appointment management and scheduling functionality within applications, providing structured planning and calendar-based organization.
- ScrollBar ExScrollBar/NET is a customizable scrollbar component that simulates vertical and horizontal scrollbars, sliders, tracks, volume controls, and gauge interfaces for application UI design.
- ShellView ExShellView/NET is a file list view component that replicates the Windows Explorer right pane, providing detailed shell-based file browsing within applications.
- SkinBox ExSkinBox/NET is a skinnable message and input box component that supports HTML-formatted content and custom images for enhanced dialog presentation.
- Slider ExSlider/NET is a skinnable slider component for forms and dialogs, enabling customizable slider controls for selecting values within applications.
- SplitBar ExSplitBar/NET is a splitter component that enables dynamic resizing of docked controls by dragging a split bar between panels in horizontal or vertical layouts.
- StatusBar ExStatusBar/NET is a fully customizable status bar component featuring CRD-based layout, skinning, HTML support, tooltips, icons, owner draw, and progress bar capabilities for rich application interfaces.
- Surface ExSurface/NET is a visual layout component for organizing objects on a surface to create organigrams, diagrams, graphs, flowcharts, and other structured visual representations.
- Swimlane ExSwimlane/NET is a swim lane diagram component for creating process flow visualizations that define roles, responsibilities, and workflows in horizontal or vertical layouts.
- Tab ExTab/NET is a skin-based tab control for organizing interface content using tabs, similar to notebook dividers or file cabinet labels, enabling structured navigation within applications.
- Thumbnail ExThumbnail/NET is a thumbnail view component that displays reduced-size previews of files and images, making it easier to browse and recognize visual content in applications.
- ToolBar ExToolbar/NET is a customizable toolbar component that organizes buttons, icons, dropdowns, and editors into rows or columns, enabling quick access to application functions with skin-based appearance customization.
- ToolTip ExTooltip/NET is a tooltip component that provides enhanced tooltip functionality for applications, displaying contextual information when users hover over interface elements.
- Tree ExTree/NET is an advanced tree view component supporting single and multi-column tree structures, list, and listview modes for flexible hierarchical data display in applications.
- TreeCube ExTreeCube/NET is a visualization library that provides fisheye and cube-map representations for components such as calendars and multi-column tree views, enhancing data exploration.
- XMLGrid ExXMLGrid is an XML-style grid and tree view component that provides high-performance data visualization with advanced formatting features and customizable skins for enhanced UI appearance.
-
WPF Components
- Suite ExSuite/WPF is a complete developer solution offering a suite of UI components including combo, list, tree, grid, Gantt, gauge, and chart controls for advanced data visualization and application development.
- CalcEdit ExCalcEdit/WPF is a calculator edit control for real-time arithmetic expression evaluation, instant calculation results, and enhanced data entry within software applications.
- Calendar ExCalendar/WPF is a customizable calendar and date picker component featuring intuitive date selection, visual customization, tooltips, image support, and flexible date range handling.
- CascadeTree ExCascadeTree/WPF is a Miller Columns tree view component for visualizing hierarchical data, offering cascading lists, multi-column navigation, and efficient data exploration.
- ComboBox ExComboBox/WPF is an advanced combo box component combining a drop-down list and a single-line text box, allowing users to type a value or select from existing options.
- ContextMenu ExContextMenu/WPF is a GUI context menu component providing popup, shortcut, and right-click menus for fast access to context-specific commands and improved application usability.
- Edit ExEdit/WPF is an easy-to-use edit control with built-in HTML-like formatting and syntax highlighting, supporting custom tags for keywords and expressions for flexible text editing in applications.
- ExplorerBar ExplorerBar/WPF is a navigation component that reproduces the Windows XP Explorer Bar, designed for presenting large amounts of information with an intuitive interface and rich object model.
- ExplorerTree ExplorerTree/WPF is a navigation tree component that adds structured information browsing and easy navigation capabilities to applications for improved user interface organization.
- Expression Expression/WPF is a syntax editor component for defining, viewing, editing, and evaluating expressions within applications, enabling flexible expression handling and processing.
- FileView ExFileView/WPF is a file and folder view component that provides Windows Explorer-style functionality for displaying rich directory information and simulating a FolderView control within applications.
- Gantt ExGantt/WPF is a Gantt chart component for creating timeline and project scheduling visualizations, displaying activity durations as horizontal bars alongside tabular task information with customizable skins.
- Gauge ExGauge/WPF is a graphical component library for visually displaying and editing values such as levels or quantities using multi-layer views with interactive images and HTML captions.
- Graph ExGraph/WPF is a data visualization component supporting multiple chart types including line and radar charts, with printing and print preview capabilities and customizable skins for enhanced visual presentation.
- Grid ExGrid/WPF is a tree-grid component that combines grid, tree, and list views with data-bound or unbound support, offering flexible data visualization and advanced formatting features for modern application interfaces.
- Grid-Gantt ExG2antt/WPF is an editable tree-grid component with integrated Gantt chart functionality, combining grid and Gantt features in a single control with customizable skins for enhanced visualization and user experience.
- HTML ExHTML/WPF is a built-in HTML display and editing engine that enables rendering and editing of HTML-like content without relying on Internet Explorer, providing flexible UI layout management for text, controls, and graphics.
- List ExList/WPF is an advanced list control for displaying and editing tabular data, offering customizable skins for enhanced visual appearance and flexible UI presentation.
- ListBar ExListBar/WPF is a navigation bar component modeled after Microsoft Outlook Bar, designed for displaying large amounts of information with horizontal or vertical orientation and an intuitive object model.
- Miller ExMiller/WPF is a file and folder view component that uses Miller Columns visualization to display system directories and files in a cascading list structure for efficient navigation.
- OrgChart ExOrgChart/WPF is an organizational chart component for automatic generation of hierarchy diagrams, displaying nodes with HTML captions, icons, and images for clear visualization of structures and relationships.
- Pivot ExPivot/WPF is a pivot table tool for data summarization, enabling automatic sorting, counting, totaling, and averaging of tabular data with drag-and-drop field configuration.
- PropertiesList ExPropertiesList/WPF is a properties grid control similar to Visual Studio's property editor, designed for efficient data input and compact, intuitive user interface property management.
- RadialMenu ExRadialMenu/WPF is a radial (pie) menu component inspired by Microsoft OneNote, offering customizable appearance and functionality through a tree-structured organization of tools and tool collections.
- Ribbon ExRibbon/WPF is a ribbon-style UI component similar to Microsoft Office Fluent interface, displaying graphical controls organized into tabbed toolbars for improved application navigation and usability.
- Scheduler ExSchedule/WPF is a scheduling component that enables appointment management and scheduling functionality within applications, providing structured planning and calendar-based organization.
- Surface ExSurface/WPF is a visual layout component for organizing objects on a surface to create organigrams, diagrams, graphs, flowcharts, and other structured visual representations.
- Swimlane ExSwimlane/WPF is a swim lane diagram component for creating process flow visualizations that define roles, responsibilities, and workflows in horizontal or vertical layouts.
- Thumbnail ExThumbnail/WPF is a thumbnail view component that displays reduced-size previews of files and images, making it easier to browse and recognize visual content in applications.
- ToolBar ExToolbar/WPF is a customizable toolbar component that organizes buttons, icons, dropdowns, and editors into rows or columns, enabling quick access to application functions with skin-based appearance customization.
- Tree ExTree/WPF is an advanced tree view component supporting single and multi-column tree structures, list, and listview modes for flexible hierarchical data display in applications.
- TreeCube ExTreeCube/WPF is a visualization library that provides fisheye and cube-map representations for components such as calendars and multi-column tree views, enhancing data exploration.
- XMLGrid ExXMLGrid is an XML-style grid and tree view component that provides high-performance data visualization with advanced formatting features and customizable skins for enhanced UI appearance.
-
JS Components
- Calendar ExCalendar/JS is a customizable calendar and date picker component featuring intuitive date selection, visual customization, tooltips, image support, and flexible date range handling.
- ComboBox ExComboBox/JS is an advanced combo box component combining a drop-down list and a single-line text box, allowing users to type a value or select from existing options.
- Gantt ExGantt/JS is a Gantt chart component for creating timeline and project scheduling visualizations, displaying activity durations as horizontal bars alongside tabular task information with customizable skins.
- Gauge ExGauge/JS is a graphical component library for visually displaying and editing values such as levels or quantities using multi-layer views with interactive images and HTML captions.
- Graph ExGraph/JS is a data visualization component supporting multiple chart types including line and radar charts, with printing and print preview capabilities and customizable skins for enhanced visual presentation.
- ICalendar ExICalendar/JS is a component library implementing the iCalendar data format (RFC 5545), enabling exchange of calendaring and scheduling information such as events, tasks, and free/busy data between applications.
- Menu ExMenu/JS is a versatile menu component that simulates menu bars, popup menus, toolbars, option buttons, and pick lists, providing flexible UI navigation and interaction for applications.
- OrgChart ExOrgChart/JS is an organizational chart component for automatic generation of hierarchy diagrams, displaying nodes with HTML captions, icons, and images for clear visualization of structures and relationships.
- Pivot ExPivot/JS is a pivot table tool for data summarization, enabling automatic sorting, counting, totaling, and averaging of tabular data with drag-and-drop field configuration.
- RadialMenu ExRadialMenu/JS is a radial (pie) menu component inspired by Microsoft OneNote, offering customizable appearance and functionality through a tree-structured organization of tools and tool collections.
- Rollist ExRollist/JS is an innovative list control that displays items on an elliptical shape, rotating content to keep items visible without traditional scrolling for a unique user interface experience.
- Scheduler ExSchedule/JS is a scheduling component that enables appointment management and scheduling functionality within applications, providing structured planning and calendar-based organization.
- ScrollBar ExScrollBar/JS is a customizable scrollbar component that simulates vertical and horizontal scrollbars, sliders, tracks, volume controls, and gauge interfaces for application UI design.
- Surface ExSurface/JS is a visual layout component for organizing objects on a surface to create organigrams, diagrams, graphs, flowcharts, and other structured visual representations.
- Swimlane ExSwimlane/JS is a swim lane diagram component for creating process flow visualizations that define roles, responsibilities, and workflows in horizontal or vertical layouts.
- Tree ExTree/JS is an advanced tree view component supporting single and multi-column tree structures, list, and listview modes for flexible hierarchical data display in applications.
-
Tools
- ExHelper (how to tool) ExHelper is a developer tool that helps quickly find answers and source code examples for UI component usage, while allowing real-time code editing and instant result preview.
- ExInstaller (installer/uninstaller tool) ExInstaller is a software installation component and API used for installing, maintaining, and removing software products through packaged installation files.
- ExImages (BASE64 tool) ExImages is a Base64 encoder and decoder tool for converting images, icons, and picture files into Base64 strings for use in visual appearance and HTML image methods.
- ExEBN (skinning tool) ExEBN is a tool for viewing, creating, and editing EBN files, enabling management of UI element structures organized as hierarchical trees of parent and child elements.
- ExETB (skinning tool for eXTab) ExETB is a tool for viewing, creating, and editing ETB files used for defining skins for the ExTab component, where UI elements are structured in a hierarchical tree of parent and child relationships.
- ExCRD (layout tool) ExCRD (Exontrol Custom Row Designer) is a WYSIWYG layout design tool for creating custom cell, row, node, and column structures, generating CRD strings for flexible and readable UI layout definitions.
-
COM Components
- Download↓
-
FAQ
- Gauge (Related)
- General
- ABL - OpenEdge
- AutoIt - AutoItScript
- ASP.NET
- C++
- C++ Builder
- CICODE (Citect SCADA)
- Clarion
- DBASE Plus
- Delphi
- JavaScript (JS)
- JScript (/COM IE)
- LABView - National Instruments
- Microsoft Dynamics 365
- Microsoft Dynamics Ax - Axapta (X++)
- Microsoft Dynamics NAV (C/AL)
- Microsoft Office - Access/Excel/Word
- NET Framework (C#, VB/NET)
- PowerBuilder
- VB (VB6, VBA)
- VBScript
- VFP
- Visual DataFlex (Data Access)
- WPF
- Xbase++
- Get Started
- Testimonials
- Gallery
- Contact
The ExGauge library provides graphical capabilities for visually displaying and editing the amount, level, or content of a given value. Its view can contain one or more layers, where each layer may include multiple transparent images and HTML captions. These elements can be clipped, moved, rotated, or combined, and are fully interactive through mouse actions such as dragging or wheel scrolling, as well as keyboard input. |
|
|


| How-To Questions | |
| FAQ | |