If the Skin parameter points to a string expression, it can be one of the following:
- A path to the skin file ( *.EBN ). The ExButton component or ExEBN tool can be used to create, view or edit EBN files. For instance, "C:\Program Files\Exontrol\ExButton\Sample\EBN\MSOffice-Ribbon\msor_frameh.ebn"
- A BASE64 encoded string that holds the skin file ( *.EBN ). Use the ExImages tool to build BASE 64 encoded strings of the skin file ( *.EBN ). The BASE64 encoded string starts with "gBFLBCJw..."
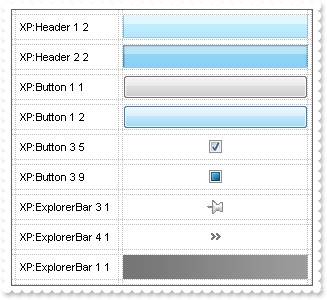
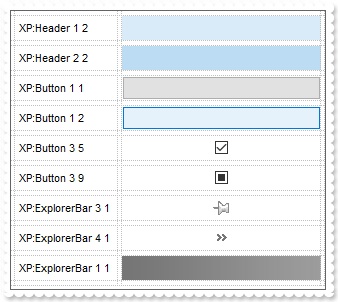
- An Windows XP theme part, if the Skin parameter starts with "XP:". Use this option, to display any UI element of the Current Windows XP Theme, on any part of the control. In this case, the syntax of the Skin parameter is: "XP:ClassName Part State" where the ClassName defines the window/control class name in the Windows XP Theme, the Part indicates a long expression that defines the part, and the State indicates the state of the part to be shown. All known values for window/class, part and start are defined at the end of this document. For instance the "XP:Header 1 2" indicates the part 1 of the Header class in the state 2, in the current Windows XP theme.
The following screen shots show a few Windows XP Theme Elements, running on Windows Vista and Windows 10:
- A copy of another skin with different coordinates ( position, size ), if the Skin parameter starts with "CP:". Use this option, to display the EBN, using different coordinates ( position, size ). By default, the EBN skin object is rendered on the part's client area. Using this option, you can display the same EBN, on a different position / size. In this case, the syntax of the Skin parameter is: "CP:ID Left Top Right Bottom" where the ID is the identifier of the EBN to be used ( it is a number that specifies the ID parameter of the Add method ), Left, Top, Right and Bottom parameters/numbers specifies the relative position to the part's client area, where the EBN should be rendered. The Left, Top, Right and Bottom parameters are numbers ( negative, zero or positive values, with no decimal ), that can be followed by the D character which indicates the value according to the current DPI settings. For instance, "CP:1 -2 -2 2 2", uses the EBN with the identifier 1, and displays it on a 2-pixels wider rectangle no matter of the DPI settings, while "CP:1 -2D -2D 2D 2D" displays it on a 2-pixels wider rectangle if DPI settings is 100%, and on on a 3-pixels wider rectangle if DPI settings is 150%.
The following screen shot shows the same EBN being displayed, using different CP: options: